 |
Figure 3 [Full image 38.9kb] |
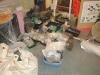
The saga of the development at Merton Abbey Mills continues. It has enabled a reasonable thorough dig at Bennetts Mill by Dave Saxby and his Molas team, but a by product of that is that it allows the subsequent destruction of the site. Merton Abbey Mills Update. Figure 3 - Some of the bagged 㣃inds', temporarily stored in the wheelhouse. Figure 4 - This dig provided a fair spectator sport for the three days, and it was carried out in a wonderfully informal way.
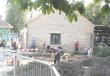 |
Figure 4 [Full image 35.5kb] |
Merton Abbey Mills Update: 2 Time Team
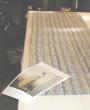 |
Figure 6 [Full image 38.9kb] |
The Time Team's visit in September provided a welcome element of publicity and exposure for the Wandle and its Industrial History. Purists are rightly concerned at the blinkered historical approach evidenced by the film itself, but we can put that down to the constraints imposed on the program.
Figure 6 - The finished print with a copy of the digital overlay showing how it may have looked as a dress material. Figure 5 - Oops! The flash of my camera interrupted filming. This is the only record we have of Mary with Val the printer, and Time Team's Phil at work on the block print
 |
Figure 5 [Full image 53.5kb] |
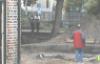 |
Figure 3 [Full image 33.6kb] |
These photographs are snapshots of the event, selected fairly arbitrarily from those I took. My main worry is that I was not able to take photos of Mary at work with Bill Rudd on the block printing demo, or even Norman Fairey, who built the table and made the tiering trolley, owing to constraints on space and time, but we received a nice letter of thanks for our help. It's just a pity the Museum's name could not have been included in the credits at the end.
There will be two copies of the video of the broadcast in the Museum for record purposes, but I am sure they can be borrowed, subject to the usual rules. Figure 8 - The home made tiering trolley, and work bench
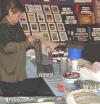 |
Figure 6 [Full size image 37.9kb] |
Merton Abbey Mills Update 3: Bennetts Mill
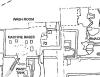 |
Figure 7 [Full size image 39kb] |
What follows is the article Dave Saxby wrote to give out to visitors to his Bennetts Mill dig. I can't resist inserting here, however, the plan he did showing the results of his excavations overlaid on the 1894 Map represented by the dotted lines (see article). The accuracy is quite astonishing.